
A home environment sensor
Visionect, 6 Mar 2014
How we made a home environment sensor display from a Raspberry Pi and electronic paper DIY kit.
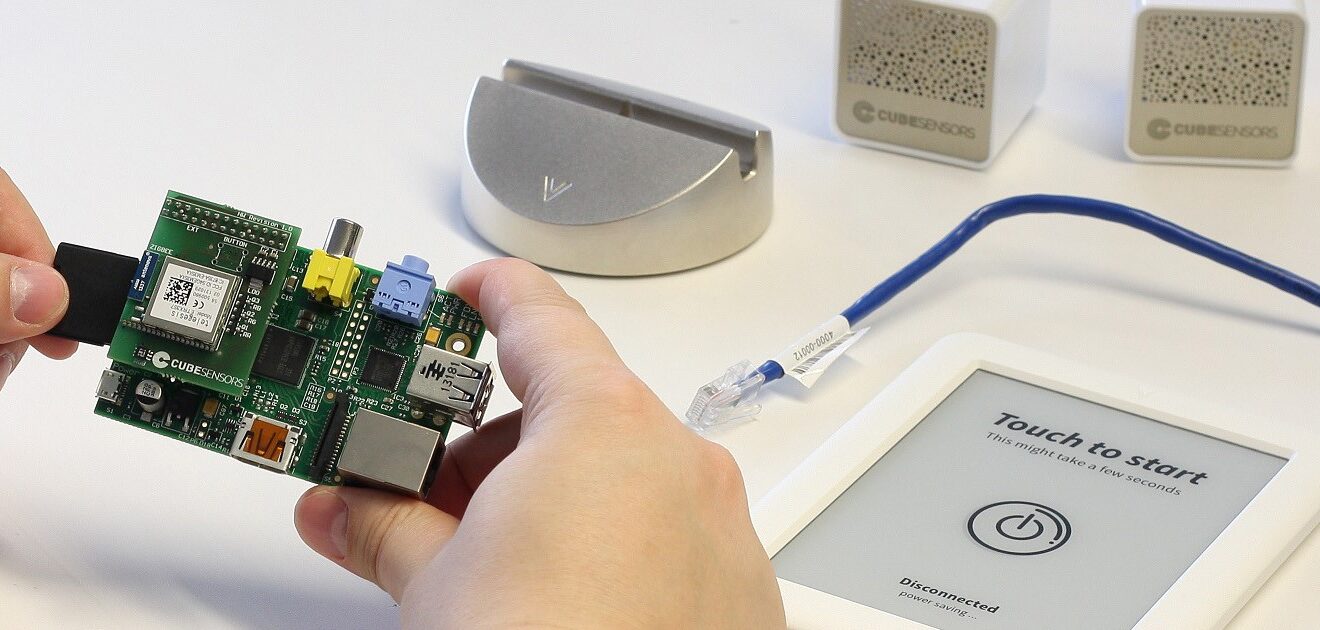
Matevž scraped together some hardware collecting dust around the office. A Raspberry Pi out of a fellow startup’s device, an e-ink display his startup is working on, and a Wi-Fi dongle from the internets.
What happens when you deploy Visionect’s stack to the Raspberry Pi? A Webkit instance on a server that renders websites and sends the resulting images to simple e-paper devices over the air. The device is just the interface, the server does all the heavy lifting.
Can the Raspberry Pi handle it?
Visionect’s frontend wizard, Matevz, decided to find out. He found Raspberry Pi boards inside Cubesensors, mixed two of the most interesting Slovenian hardware startups together, and barely broke a sweat doing it.

Cubesensors are cute!
You might not have the same stuff laying around as Matevž does, but you don’t need much really.
The hardware
A Raspberry Pi will act as the server doing all the heavy lifting. Talking to the sensors, rendering output for the display and so on. Something, anything, on the Pi needs to produce ZigBee log files. We’re going to parse these to produce a shiny dashboard.
Getting a few cute and cuddly Cubesensors will be easiest.
Then you need some way to display the data. Matevž used Visionect’s V Tablet, but anything that can open a webpage will do. E-ink just happens to have great battery life.

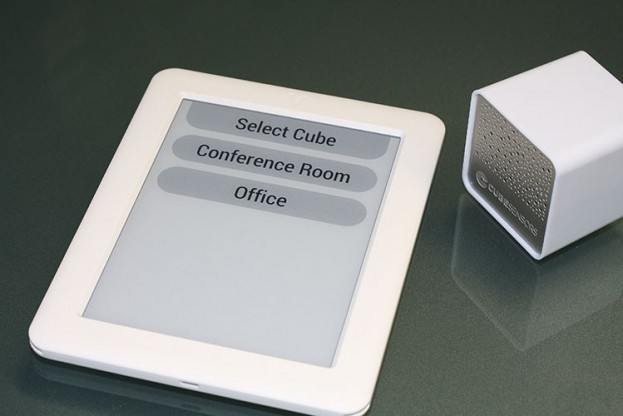
Shiny V Tablet with a cute Cubesensor. Perfect.
Visionect+Cubesensors+node.js = win
Contrary to what you’d expect, shoving a server that usually takes a beefy processor and many rams onto the 700MHz Raspberry Pi was completely uneventful. It just worked.
- install some dependancies
- make deb packages for Visionect things
- use gvm to update Go and get the admin panel working
- write a log parser for sensor logs
- make a simple static file server
- write some code to display data
- hook up the tablets
And that’s it. That’s all it took. Imagine my disappointment expecting a juicy tale of trial and error, of heroic hacking and triumph. Instead, everything just … worked.
Matevž says the hardest part was creating those deb packages, but now you can just run sudo apt-get install koala.
If you ever need to make a deb package, Matevž swears by the seven step guide from Web Upd8.
PARSING LOG FILES
Because there’s still no official API, Matevž had to do some inventive hacking – parsing ZigBee logs.
When Cubesensors talk to each other, they leave a trail in /var/log/ziggy.stdout.log. I’m not sure why, but it sure came in handy.
Logs look like this:
New node id=409D, eui64=000D6F0003053413 000D6F0003C16E48: data = {"noise": 16.532, "temp": 24.5, "fw": 28, "battery": 2464, "light": 1708, "voc": 400, "humidity": 1576, "pressure": 986.0, "voc_resistance": 14590, "shake": true} 000D6F0003C16E48: score = 66.297 (temp=23.5/1.0 humidity=20.0326797386/-0.348102820428 voc=450/1 noise=16.532/1) 000D6F0003C16E48: reply = '\x11\x00B' (kwargs={"home": true, "score": 66}, queue={}) Sequences: '8F' added Sequences: '8F' done (ACK), removing. 000D6F0003053413: received ping 000D6F0003053413: reply = '\x10\x00' (kwargs={"home": true}, queue={})
Parsing those into a useful form is a simple matter of using node’s Tail package and applying a regex.
var tail = new Tail("/var/log/ziggy.stdout.log"),
 pat = /\ (.*?): data = (.*?})/g,
 sensors = {};

tail.on("line", function(line) {
 var data = pat.exec(line);
 if (data) {
 sensors] = JSON.parse(data);
 }
 });
See, simple.
Displaying the data

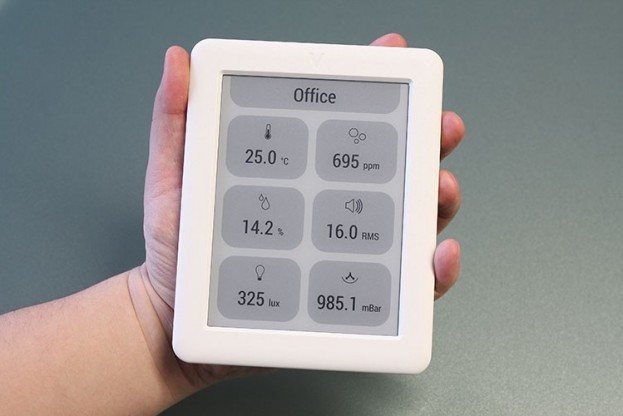
Sweet, V Tablet shows some data!
Our data is in a friendly JSON format. All we need now is a web app to display it.
First you’ll need a static server. Because you’re using node.js to parse the logs, a server is just a node-static away. But Matevž is a frontend developer so he didn’t know that and built it himself. That’s okay too.
Most of the frontend code is boring because it just handles navigation. FetchData is more interesting because it deals with displaying the data. An interval calls it every ten seconds.
fetchData = function() {
 $.getJSON('data.json', function(new_data) {
 data = new_data;
 $.each(data, function(id, cube) {
 cube.voc = Math.max(cube.voc - 900, 0)*0.4 + Math.min(cube.voc, 900)
 cube.humidity = Math.min(95, Math.max(10, (cube.humidity -330*5.1)/(600/1000*5.1) + 55))
 cube.light=10/6.0*(1+cube.light/1024.0)*4.787*Math.exp(-(Math.pow((cube.light-2048)/400.0+1, 2)/50.0))) *(102400.0/Math.max(15, cube.light) - 25);
 });
 if ($('#data').is(':visible')) {
 renderData($('#data').data('id'));
 }
 });
 }
Mmm, maths. And magic numbers.
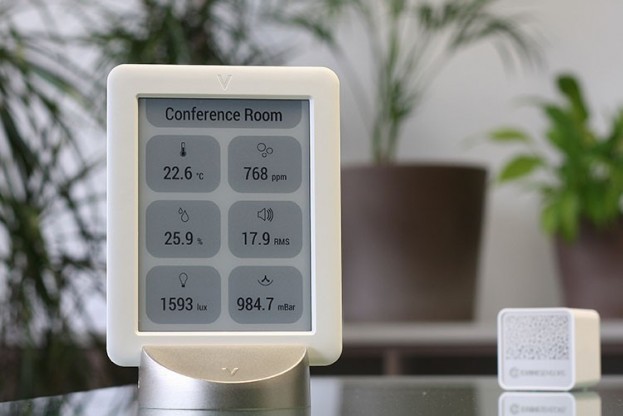
To be honest, I’m not sure how those conversions work or what any of the numbers mean, but the end result is a human readable display of temperature, noise, humidity, light, air pressure, and air quality in a room. You can get the full source code at github.com/visionect/cubesensorsdislpay.

A bunch of environmental data on an e-paper V Tablet.
Hooking up the tablets
Now we have to turn the Raspberry Pi into a WiFi hotspot for the tablets.
You’ll need a wi-fi dongle, some more deb packages, and a bit of configuration. Matevž says he used the TP Link TL-WN722N dongle, but you can use whatever you’ve got. Especially if it’s based on the Atheros chipset.
Then you have to add deb http://mirrordirector.raspbian.org/raspbian/ wheezy non-free to/etc/apt/sources.list and run apt-get install firmware-atheros isc-dhcp-server hostapd to install all the packages.
After that, some configuration:
auto wlan0
 iface wlan0 inet static
 address 192.168.20.1
 netmask 255.255.255.0
 network 192.168.20.0
 broadcast 192.168.20.255

# /etc/dhcp/dhcpd.conf

subnet 192.168.20.0 netmask 255.255.255.0 {
 range 192.168.20.100 192.168.20.200;
 option routers 192.168.20.1;
 interface wlan0;

}

# /etc/hostapd/hostapd.conf

interface=wlan0
 driver=nl80211
 ssid=WIFI_NAME
 hw_mode=g
 channel=11
 wpa=1
 wpa_passphrase=WIFI_PASSWORD
 wpa_key_mgmt=WPA-PSK
 wpa_pairwise=TKIP CCMP
 wpa_ptk_rekey=600
 macaddr_acl=0

# /etc/init.d/hostapd.conf

DAEMON_CONF=/etc/hostapd/hostapd.conf
Then tell the Raspberry Pi to turn into an access point every time it boots:
update-rc isc-dhcp-server defaults
update-rc hostapd defaults
A bunch of sensors inside a plastic box hooked up to a Raspberry Pi talk to a palm-sized e-paper tablet.
And voila. A self-contained system where a bunch of sensors inside a plastic box hooked up to a Raspberry Pi talk to a palm-sized e-paper tablet.
Well, you have to tell the tablet to connect to this access point as well. But that’s trivial – go into settings, input the right IP addresses. Then don’t forget to visit Visionect admin panel at http://192.168.20.1:8150 and tell it which URL to serve. For the Cubesensors experiment this was http://192.168.20.1:8888.
Do it yourself
Let’s recap. To turn your Raspberry Pi into a Visionect server you have to:
- add Visionect’s deb packages to sources.list, visit: packages.visionect.com
- get a Wi-Fi dongle
- convince your Pi to act as an access point
- tell the tablet where to connect
But I’m sure with some of elbow grease you can make almost any combination of hardware do these things. Our way might just be easier.
WHAT ARE YOU GOING TO BUILD?
Matevž made a room sensor display on an e-paper V Tablet. What are you going to build?
Swizec Teller is a geek with a hat. He wrote this guest post as part of an ongoing showcase of interesting projects from our community. You can follow him on twitter, here.
Tags

